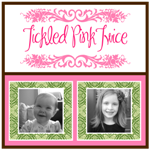
Valentine’s Day Crafts {over}Done
All I can say is “Phew!” Another holiday is almost over. I finally get to relax with the hubby tonight after many hours crafting for Bean, her friends, and her school. As always, I tend to over do, bite off more than I can chew, or whatever you want to call it. Would I have it any other way? Of course not.
My first project was creating a skirt for Bean to wear to school. I couldn’t send her to school without something special to wear for Valentine’s Day, right? So she likes the skirt so much and loves her BFF’s that she insists on me making some for her friends. Sure, why not?

This is one of her BFF’s sporting a skirt. I did make an “oops” on her skirt and accidentally cut a hole after trimming seams; nothing a cute flower couldn’t fix. But now the rest of the girls in the class want skirts. Guess I’m getting practice and ironing out the pattern tweeks before I start selling them.

My little model, Bean, is sporting a new 2-layer skirt pattern. She’s so skinny that I shirred the waist. I LOVE how it turned out and pretty good for my first time shirring. I’m going to have to add a tutorial here soon.
Skirts got finished and the Valentine’s had to be worked on. Bean is a great helper and cut out all the fabric for the bags to be sewn. I’d as the hubby but he can’t cut a straight line if his life depended on that. Don’t think they learned that in Grad school. Of course, I think he’s faking it so he doesn’t have to help; do you blame him?

I love how Bean has started to really enjoy more detailed crafts. She did all of the Cricut cutting of her tags, stamped them, and loaded the bags with Hugs & Kisses. A much better alternative to those store bought Valentine’s anyday…except they didn’t have tatoos, which seemed to be popular this year.
I stayed up until 2 am cooking cupcakes and getting a game ready for school. Note to self: buy and additional cupcake tin. Cooking 3.5 dozen cupcakes with only a half dozen tin takes for ever. Sure, I could have only made 2 dozen but the hubby requires sweets and I made some as a thank you to a neighbor for plowing our sidewalk.

And last, but not least, you must always use Mod Podge and never forget a teacher. So I finished up the jars for Bean’s teachers, school secretary, and most popular janitor this side of the Rocky Mountains.

Maybe this is why I’m feeling so under the weather this week. Here’s hoping I can fully recover before Tuesday!

Valentine’s Bird Feeder
We had some snow over the weekend. Nothing like the Blizzard on the east coast, but we did get about 7 inches of snow. Baby Bird and myself are fighting off colds as well. These factors made it one of those weekends we didn’t do anything but you just can’t let your 6.5 year old have free rein of the house. A quick craft project was in order.
Valentine’s Bird Feeder
- you need floral wire, popcorn (make it good because we ate half of it during the project), and ribbon
- Cut about 1.5 feet of floral wire. String the popcorn leaving about 1 inch on each end of the wire free of popcorn.
- Once strung, bend into either a circle or a heart.
- Cut about 1 foot of ribbon, tying in a knot after looping through the wreath.
- Hang on a tree. Voila! 10 (or 20 minute if you are my daughter) bird feeder and cute Charlie Brown tree decor.

Of course, the hubby is worried it will attract bird (i.e. poop on the sidewalk). Oh well. They like buttered popcorn.
Working on Teacher’s Gifts
I am always looking for a way to tell Bean’s teachers and school staff how awesome they are. I am also always looking for another reason to dip my brush into some Mod Podge. For Valentine’s Day, I decided to whip them up some jars full of Hugs & Kisses.

Valentine’s Candy Jar Tutorial
- you need some fabric, Mod Podge, utility knife, empty jar, sponge brush
- Trace a large circle, big enough to fully cover your lid and it’s side
- Mod Podge the entire lid and sides. This process ends up being more than one step because it takes a few coats. I think you can never use enough Mod Podge and love it when it sort of squirts through the fabric. I then know it’s not going anywhere. NOTE: fabric does move a bit. Work it with your fingers.
- Once dry, put an extra coat on the lid.
- Once totally dry, take a straight edge and trim off the extras under the lid. I typically Mod Podge any loose ends down at this point.
- And you are finished. I am going to add Hugs and Kisses. I also plan to whip out the Cricut and make some personalized labels for the fronts.
TIPS: Easy and fun project to do with your kids! You can always embellish with flower, buttons, or ribbons. I loved my fabric too much to add anything other than a label.
100th Day of School Project
Bean and I have finally finished up her 100th day of school project. If you knew/know Bean and I, it was obviously going to include the color pink and Mod Podge. I obviously helped her fine tune her idea but she really came up with the concept of doing something Valentines related. I did convince her to leave out the lace border. Except for me getting the paper ready for cutting on the Cricut and fixing some Mod Podge blobs, she did everything for the project. It turned out better than I anticipated.

- We took and 18 x 18 canvas and painted it pink.
- Using the Cricut, we cut 100 pink and white 2 inch hearts. Of course, poor planning and an unsticky cutting pad meant I had to go back to the store for more paper

- After all of the hearts were cut, she glued about 1/3 on the canvas. Once dry, a coat of Mod Podge was applied.
- Another 1/3 of hearts were glued to the canvas, starting to overlap them some. Mod Podged again.
- At this point, we started using Mod Podge as the adhesive for the last hearts. Again, once dry, Mod Podge. And complete!

It was our first school project to do and we both enjoyed working on a craft together. It look so nice that she’ll have it to put as art in her room too. BONUS!
The Apple Doesn’t Fall Far From the Tree…
The crafting side of this mother was so proud yesterday; Bean started learning to sew. Honestly, she’s been BUGGING me at all the wrong times to learn but I finally decided to be a good mom and work with her. I should have done it sooner because it wasn’t difficult at all. SOMETIMES, teaching her something can be quite the chore because she is always adding her two cents. This time she just sat there and listened. I didn’t even have to show her twice.

Of course, I have been working with her on the Cadillac of sewing machines, my Viking. I should really make her learn something and have her work with my old jallopy (and 1st machine), the Janome. You really know how to sew if you can thread a needle without a built-in threader, use your scissor instead of the handy thread cutter on the machine, and load a bobbin in the metal contraption as opposed to the convenient, easily accessable compartment. I can’t believe I taught myself to be an amazing sewer (never feels like this word is right) and sewed for 3 years on the machine. Not really tooting my own horn but I think I can hold my own considering I haven’t had any classes; got to love the internet and blogs.
Anywho, so she’s mastered sewing straight-lines and something close to a square on paper, we are going to give fabric a go over the weekend. She is dying to actually sew something as opposed to scraps. Patience grasshopper.
Here are some great references if you are looking to teach your junior crafter how to sew:
Girl’s Bandana Skirt Tutorial
Last Sunday, I mentioned my addiction to little girl’s skirts and my desire to sew a bagillion of them. Well, I took some well deserved time for myself today and did something for someone else (of course). With Bean being with Gammie, the hubby and I only had to juggle Baby Bird. But only having one kid for a few hours doesn’t mean that I would have a ton of time. So I decided to try my hand at the toddler bandana skirt tutorial I found online but try and make it work for my leggy 6.5 year old…
Girl’s Bandana Skirt Tutorial:
-
you need 2 bandanas, 2 strips of fabric (6 in x 22 in), coordinating thread, 3/4 in elastic, safety-pin, and a sewing machine (unless you are some amazing and patient hand sewer)
- Take a strip of fabric, fold in half, wrong sides together. Iron. Repeat for the second strip of fabric.
- Lay one of your bandana, right side up. On the bottom of the bandana, lay a strip of fabric right side down (both sides of the strip are technically right sides but mine had a brocade print and one side print would be upside down if not sewn the correct way), matching the bottom of the bandana with the raw edges of your strip. Repeat for the second bandana and fabric strip.
- Sew the strip to the bandana. Iron seems. Repeat for second bandana/strip.

- Place bandana/strip right sides together, matching up seams where you sewed the bandana and fabric strip together. Sew up the side seams; you will now have a tube.
- Since you used an entire bandana, you can now skip to step 6 if you do not want to alter the length of your skirt. Trim off excess material from the top of the tube to desired length. I trimmed about 5 inches off for my lanky 6.5 year old.
- Create a casing for the elastic. Fold over 1 inch and press. Fold over another inch and press. Sew as close as you can to the edge of the 1 inch fold stopping about 2 inches from your starting point. Make sure you reinforce your start and stopping points to make sure they don’t unravel when you feed the elastic (I’ve made this rookie mistake in the past).

- Attach the safety-pin to the elastic and feed it through the casing. After it’s fed through the casing, I did a rough fitting on Bean to make sure it fit without cutting off her circulation. Sew the elastic edges together.
- Finish the casing hole, adjust the fabric around the elastic evenly, and you are done. Hand it over to your model for pictures!


TIPS: You can use the entire bandana length for a great shin length skirt. If you do take a bit off the top, I quickly back stitched the side seam ends just to make sure it doesn’t unravel during the elastic step. I then used the left over bandana length and fabric scraps to make a matching head band. I’m saving it for Flower Friday though.
Yeah Me. I get to sort of mark something off my “To Do” list. Now, if only I knew the html code to make a slash through something. I guess I’ll talk to my friend “Google” and see what she says. Toodles.
Special thanks to V and Co. for the fabulous tutorial.
Toddler Bandana Skirt Tutorial
Bean has really become increasingly interested in crafting with me. Of course, crafting with me means less crafting for me and more questions for her. I’ve really been trying to find some projects that she can do entirely on her own. She’s been working on pot holders using the old school method of those cotton loops on the plastic square loom. I know I made a TON of these as a little lady.

But even the pot holder project requires me to step in and help. I will admit that finishing the edges can be a bit more tricky than I remember. Never-the-less, I have been determined to find something that would occupy her as much as beading necklaces.
Then it hit me, friendship bracelets. Friendship bracelets are perfect because she has 2 BFF’s so far this year. After a bit of trial and error, I discovered the method of using the floss and knots was still a bit too hard for her. I finally came up with recycling an old t-shirt of hers and braiding the strips. They were simple to make; she made 3 in about 15 minutes. One for her and one for each of her two BFF’s.
5 Minute Recycled T-Shirt Friendship Bracelet:

-
You need a t-shirt or other cotton material, safety pin, and throw pillow
- Cut 6 strips of the t-shirt into 0.5 inches x 18 inches. Line up the strips so that they are aligned.
- Fold the pile of strips in half and tie a small, knot at the middle point. You now have 12 strips that are roughly 9 inches long. Since they are made from a t-shirt, they stretch.
- Pin the tied strips to the throw pillow threw the knot you just tied.
- Seperate the strips into 3 piles of 4 strips. Braid. Stretch as you braid.
- Once you come within about 1-2 inches of the end, tie another knot.
- And, now you are done. Take the bracelet off the safety pin. Just insert the knot through the loop and you have a sweet, adjustable friendship bracelet. A girl’s 6x t-shirt made 6 bracelets.
TIPS: You can use a cotton material, but try ripping the strips as opposed to cutting. The ripping will make the final product a bit more shabby chic.
Now she wants to braid herself a belt. Sounds good to me. Maybe I can get some of my own projects done, like my small list of 8 skirts.
It’s Flower Friday!
About two months or so ago, I was inside Big Lots looking for cheap picture frames for a craft. I found a whole end cap of Martha Stewart crafts for $2.00 a piece. I ended up picking up Black-Eyed Susan Crepe Paper Kit. It usually sells for $9.97 at Walmart so I thought I might as well give it a go. Yeah, so 2 months later and I still never pulled even the directions out. It seems like my crafting “To Do” list in my head is always growing.
Last week I cheated and did not actually get to try out the flower design. This week I thought that the Black-Eyed craft was a good choice and a possible challenge because I’ve never done a crepe paper project.

Special thanks to Glam Nest for the photo.
The longest part of this project was the preparation. It took me all of Grey’s Anatomy (on DVR with only some forwarding through commercials) to just cut all of the pieces I needed out. It wasn’t that there were a ton but some of the cuts were smaller.
I think they turned out pretty well for my first go at paper crafting. I’ve been looking for a pop of yellow in my office or dining room so this will be a great option and I don’t have to worry about picking up petals as they fall off.
And of course, the batteries on my camera died so I can’t put up a photo so you can see my work. I will try and find my charger so I can get a photo up.
I’m thinking of giving a go at some more of Martha Stewart’s packaged crafts. I think you can find them at Walmart and even Michaels. I haven’t been back to Big Lots since but I wonder if they have anymore of these project packs?
I hope to be saying this soon. Currently, I’m just addicted to picking out and making a list of those I want to sew. Those I’m going to sew. I suppose that is what I should expect when I have two daughters.
Speaking of daughters, our youngest just had her three-quarters birthday, turning a whopping 9 months old over the weekend. She is 28.5 inches tall and 20.5 lbs.
Happy Three Quarters Birthday Baby Bird.
Okay. Back to the skirts. I seriously had a case of “my mind won’t shut off” last night so I just kept going from blog to blog. It’s like, “Ooh..I want to make that.” “I’ve got the perfect fabric for that.” “I would change this about that.” To make it easy for myself and my readers, I figured I better make a nice little list for future reference. I might have to add them to my “To Do List” as well.
Favorite Skirt Tutorials:
- Market Skirt: Dana from Made is ULTRA talented
- Twirly Skirt: Check out the coffee cozy too
- Tiered Skirt: Another creative SAHM
- Easy Skirt: Perfect for a 2-year-old
- Dish Towel Skirt: Where can I find such cute towels?
- Bandana Skirt: And you thought bandana’s were ugly. DONE
- Cup Day Skirt: Love her cushion designs too.
- Ruffled Skirt: I have fabric envy.
Eight is enough huh. Spring in coming. Baby Bird will but up and mobile soon, therefore able to be sporting skirts a bit easier. I am aiming to get one of these skirts done this week because Bean has an audition to be an American Girl model.

I’m biased but I think she’s beautiful; she has a great chance.
Quickie Living Room Makeover!
What is a quick way to change the look of any space from bedroom to living room? PILLOWS!
Like I said in my previous posting (Mod Podge ramblings), I have a need for some more color and style in my living room. I also need to do it on a budget and myself (because I can’t seem to find anything in the store that I like).
The old throw pillows were looking a bit worn and beat up thanks to the hubby and Bean. Two were previously a red duponi silk and two were brown with a large button in the middle on both sides. The family has been so rough on the brown ones that the buttons fell off one by one (an “Not Me” was always the culprit). The silk pillows were coming apart at the zipper. I tell the hubby a million times that these pillows are not for smashing under your head for a nap or under your but while you put on your shoes.
So I recycled the silk for most of the color blocked pillow (on the love seat) and the backs of the new dot pattern pillows. I then made some ADORABLE, if I might say so myself, ruffled pillow covers for my old tattered brown ones. Note to self: learn to use your zipper foot because sewing the pillows into the covers is ANNOYING. I am so not a hand sewer or a horrible whip stitcher. No close up shots there because the stitching looks pretty bad.

I think they turned out better than I expected, especially the ruffled ones. I’ve got my own “special” way to do my ruffles. Honestly, it is so much easier than whipping out the ruffler. I’m going to make a pillow for Baby Bird’s room so I might just show you my trick.
Loving the satin ruffle so much I am going to add it to a shirt and onesie of the girls. Heck, I love ruffles so much that I am going to ruffle almost as much as I Mod Podge.
Night Ya’ll